How to Create a Class in BookFit
by Bookfit | Published on Jul 17, 2026

To create a class in BookFit, open Classes from the Products section of the dashboard and select Create Class. You will then add the class details, build its repeating schedule, choose payment methods, set booking policies and review everything before creating the class.
In BookFit, a class is the overall repeating service, such as Yoga or HIIT. A session is an individual scheduled occurrence of that class on a particular day and at a particular time.
Open the Classes page
- Sign in to the BookFit dashboard.
- Find Products in the navigation menu.
- Select Classes.
- Select Create Class in the top-right corner.
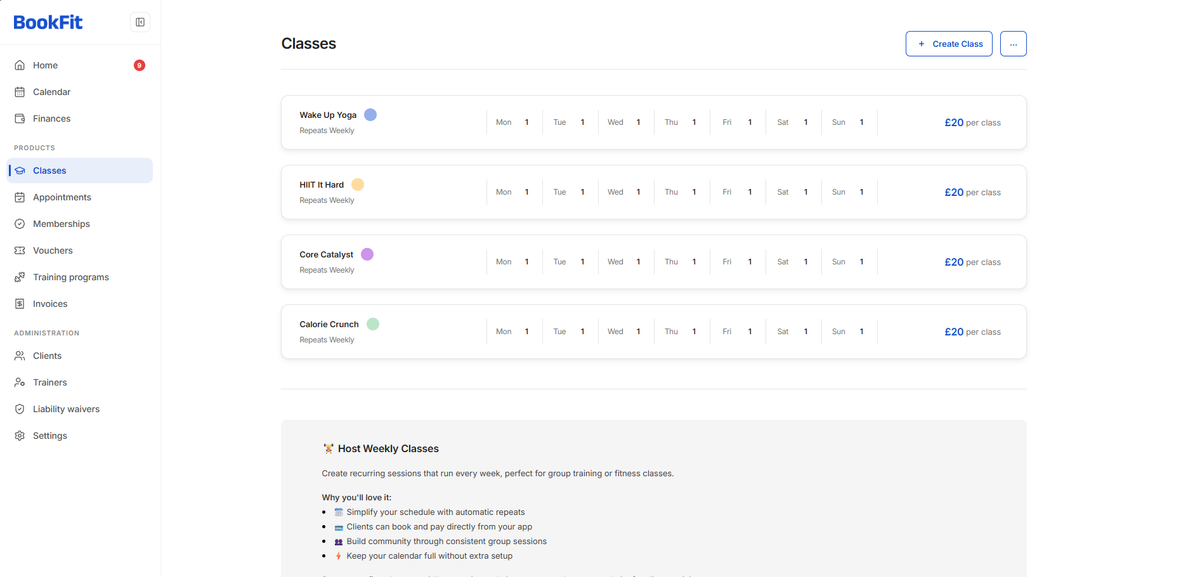
Step 1: Add the class basics
The Class Basics step defines the information that applies to the overall class.
- Class Name: Enter a short, recognisable name, such as Yoga, HIIT or Beginner Strength.
- Repeats: Choose how often the class sessions repeat.
- Start Date: Choose when BookFit should begin creating the repeating sessions.
- Tag colour: Optionally select a colour to help organise the class on your dashboard and calendar.
- Waiting list: Enable this option if clients should be able to join a waiting list when a session is full.
When waiting lists are enabled, clients can join the waiting list and be notified if a booking becomes available.
Select Next after checking the class basics.
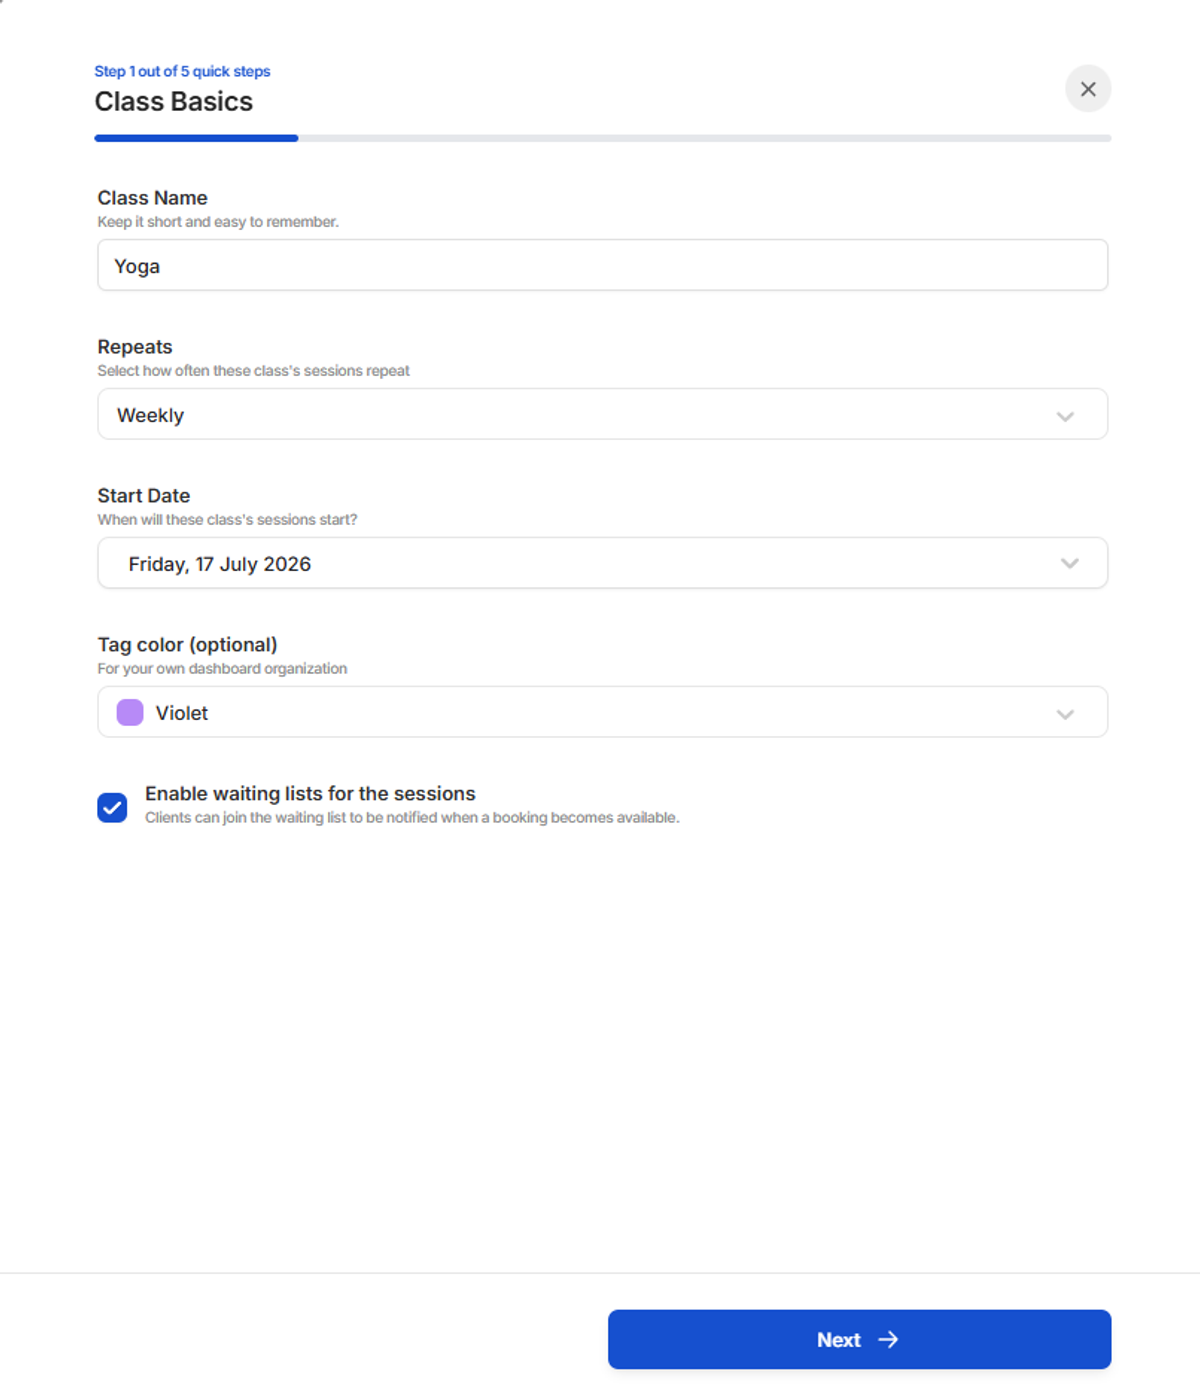
Step 2: Build the timing and schedule
The Timing & Schedule step determines when the class runs. Select Add Session beside each day on which you want to schedule the class. You can add more than one session to the same day.
Complete the following information for every repeating session:
- Name: Enter a name for the individual session. This can match the main class name.
- Trainer: Assign the trainer responsible for the session.
- Start Time: Choose when the session begins.
- End Time: Choose when the session finishes.
- Location: Select where the session takes place.
- Max Clients: Set the maximum number of clients who can book.
- Tag Color: Keep the class colour or select a different colour for that session.
Use Remove if you add a session by mistake. When the weekly schedule is complete, select Next.
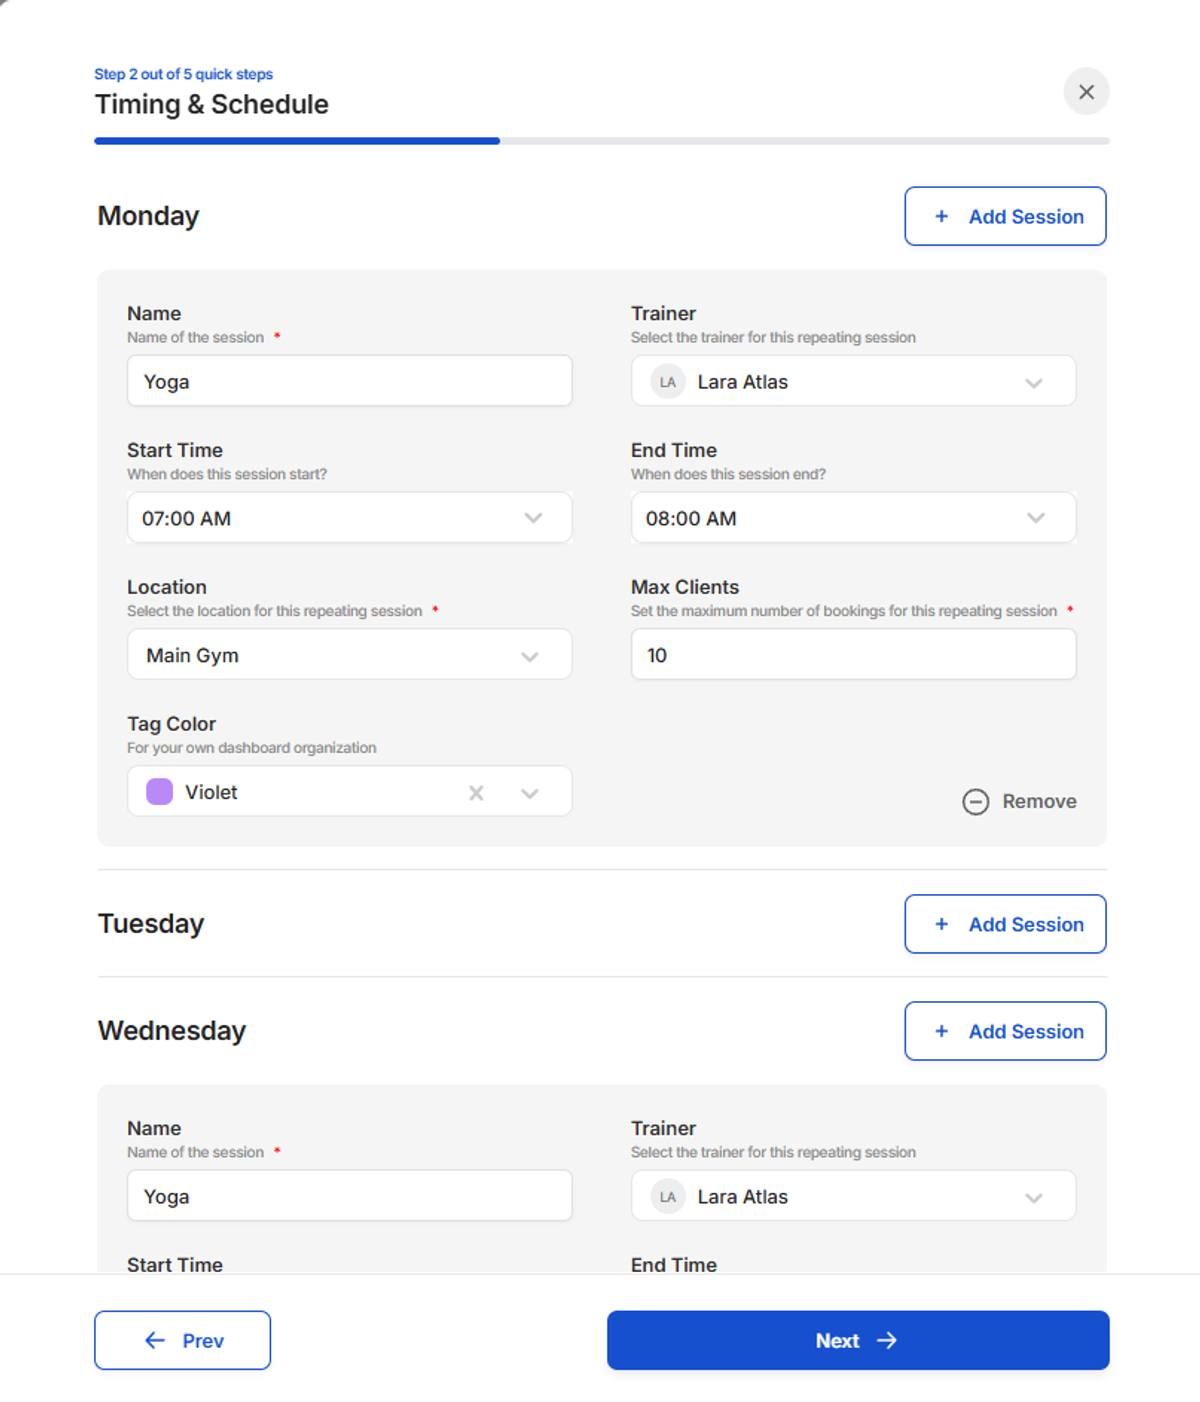
Step 3: Set the price and payment methods
Enter the price that one client pays for one class session. Then choose one or more payment methods that clients can use.
- Cash: Clients pay offline, and you track the payment manually.
- Card: Card payments can be selected after they have been enabled in Settings.
- Membership: A membership must already exist before it can be accepted as payment.
- Voucher: A voucher must already exist before it can be accepted as payment.
Payment methods that have not yet been configured will appear unavailable. Complete the required setup before returning to the class if you want to enable them.
You can also enable Offer first class free. When enabled, new clients will not be charged for their first booking of this class.
Select Next after confirming the price and payment methods.
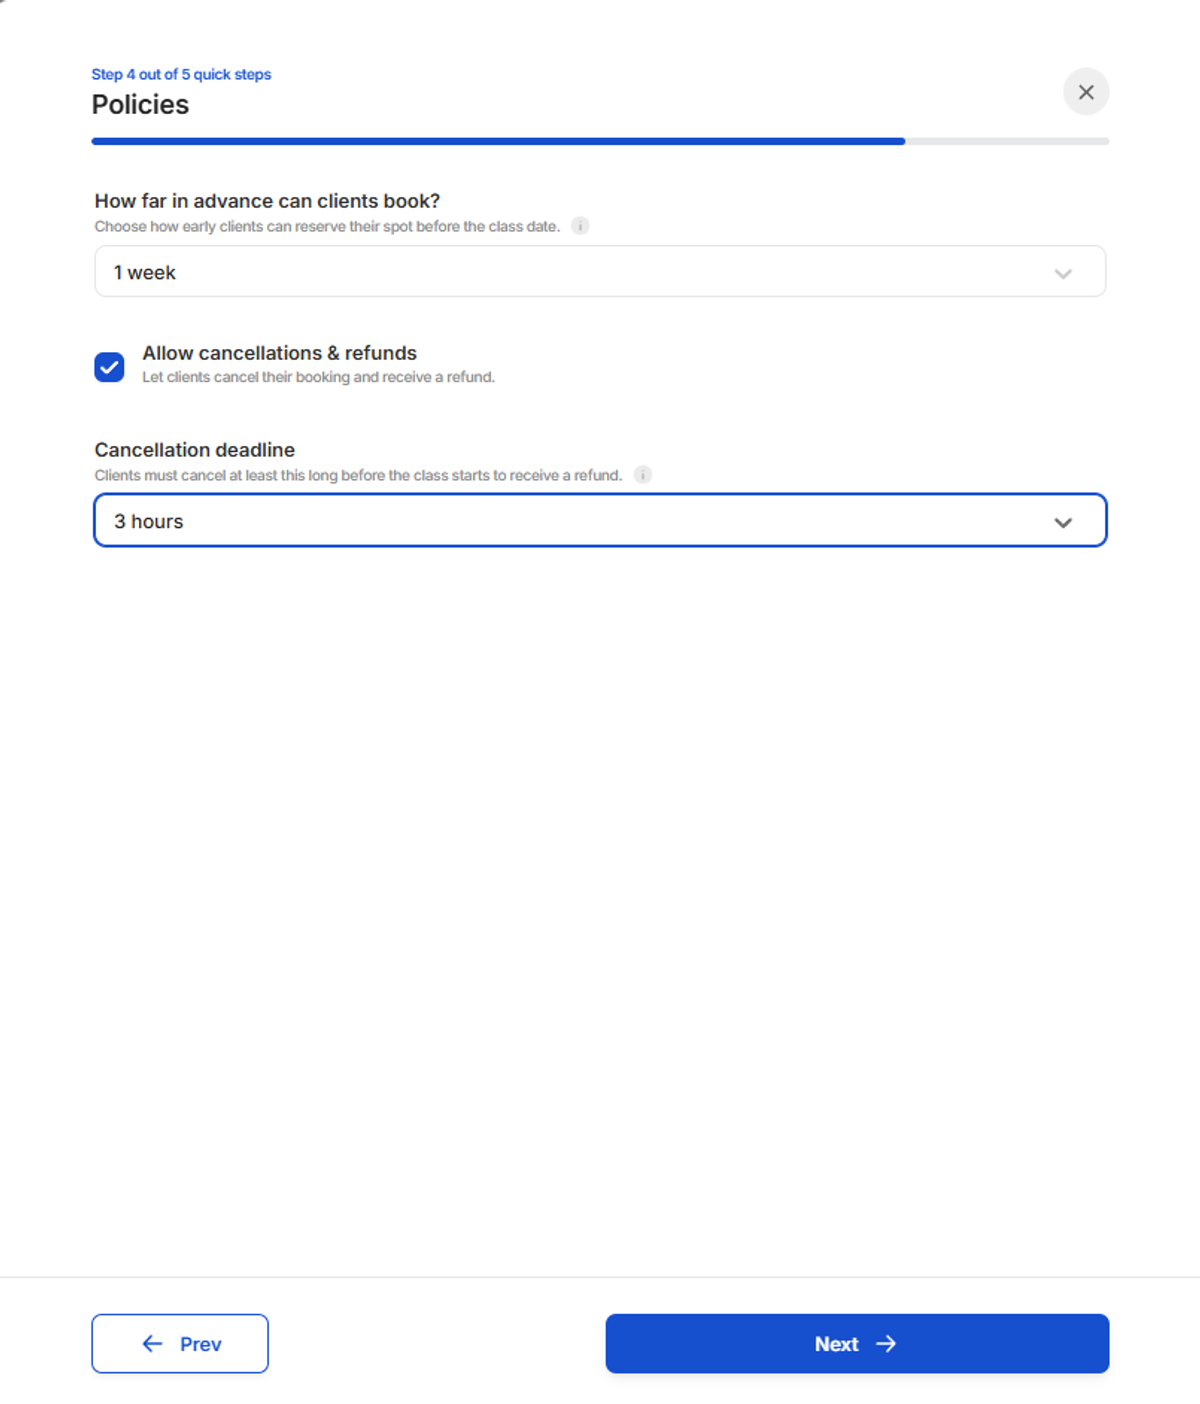
Step 4: Choose the booking and cancellation policies
The Policies step controls when clients can book and whether they may cancel their bookings.
- How far in advance can clients book?: Choose how early clients can reserve a place before the class date.
- Allow cancellations & refunds: Enable this if clients should be able to cancel their booking and receive a refund.
- Cancellation deadline: Choose how long before the class begins a client must cancel to receive a refund.
Select a cancellation deadline that gives you enough time to manage the released place or offer it to someone on the waiting list.
Select Next after checking the policies.
Step 5: Review and create the class
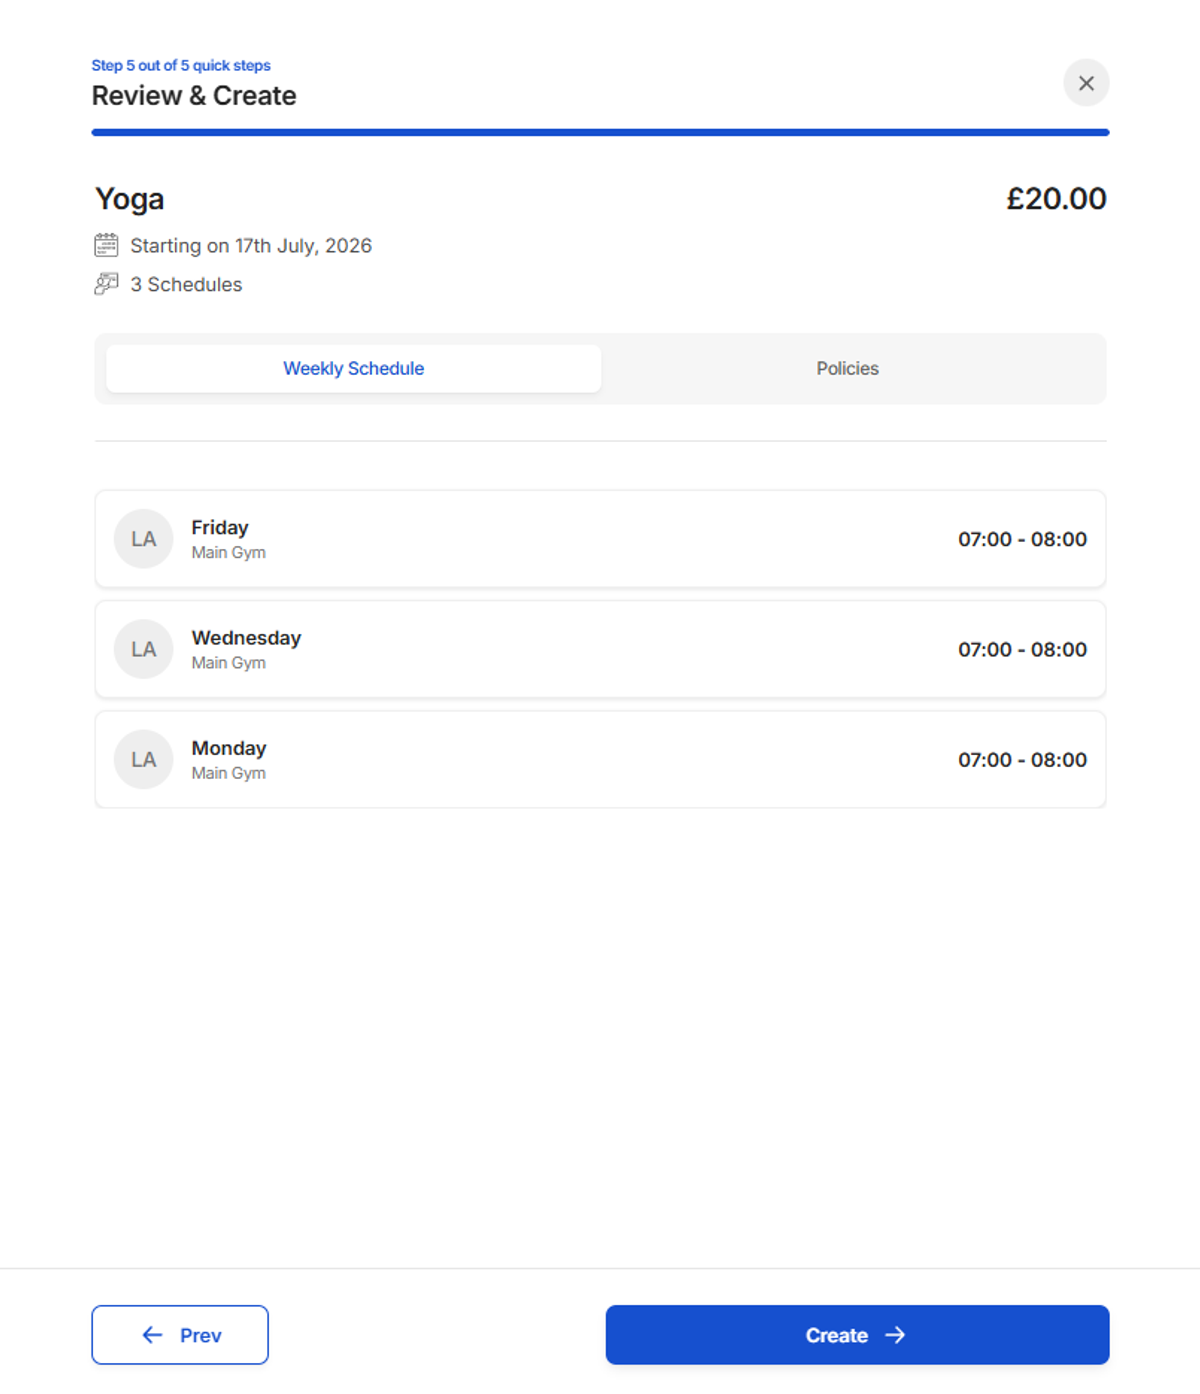
The Review & Create step summarises the class before it is published. Check the class name, price, start date and number of schedules.
Open Weekly Schedule to review each scheduled day, trainer, location and time. Open Policies to confirm the booking window and cancellation settings.
Select Prev if you need to correct information from an earlier step. When everything is correct, select Create.
Check the created sessions in the calendar
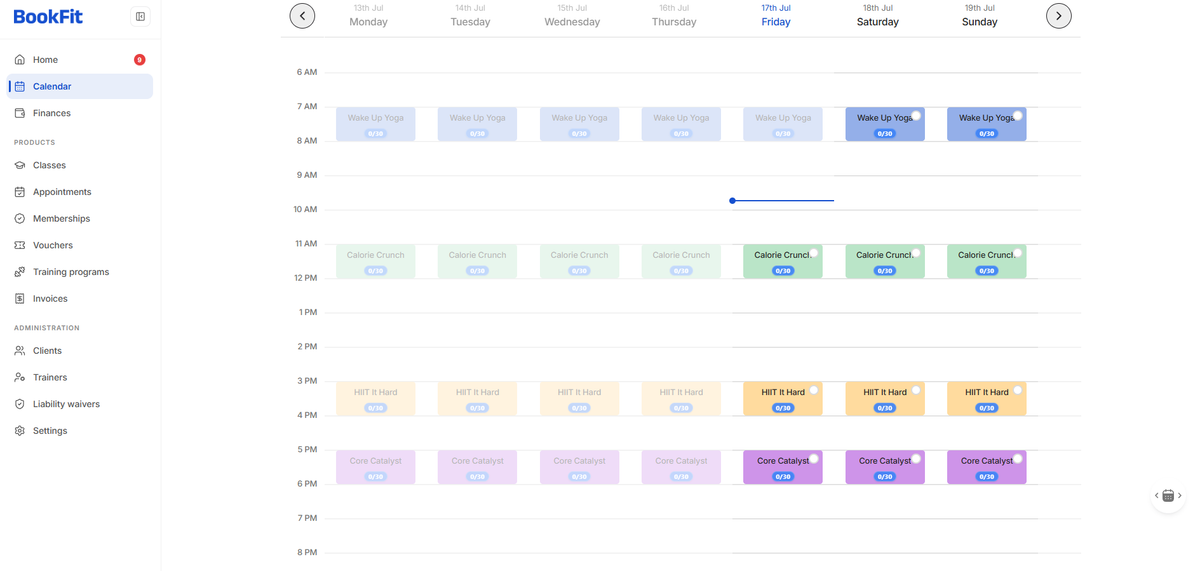
After you create the class, its repeating sessions appear in the BookFit calendar. Open Calendar and confirm that every session appears on the intended day and at the correct time.
The selected tag colours make classes easier to recognise. Each calendar entry also shows the current number of bookings against the maximum session capacity, such as 0/30.
Frequently asked questions
What is the difference between a class and a session in BookFit?
A class is the overall repeating service. A session is one scheduled occurrence of that class on a specific day and at a specific time.
Can I schedule the same class on multiple days?
Yes. Use Add Session beside every day on which the class should run.
Can I add more than one session on the same day?
Yes. You can add multiple sessions to the same day and give each one its own trainer, time, location and capacity.
Can clients join a waiting list?
Yes, if you enable waiting lists in Class Basics. Clients can join when a session is full and be notified if a booking becomes available.
Which payment methods can a class accept?
A class can accept Cash, Card, Membership and Voucher payments when the relevant methods have been configured and selected.
Where can I see the class after creating it?
The class and its repeating sessions appear in the BookFit calendar, where you can check their scheduled times, colours and booking capacity.
Once you have reviewed the schedule, payment methods and policies and selected Create, the class is ready for clients to book.